How to Photograph Lighthouses in Fog, Rain, and Rough Weather
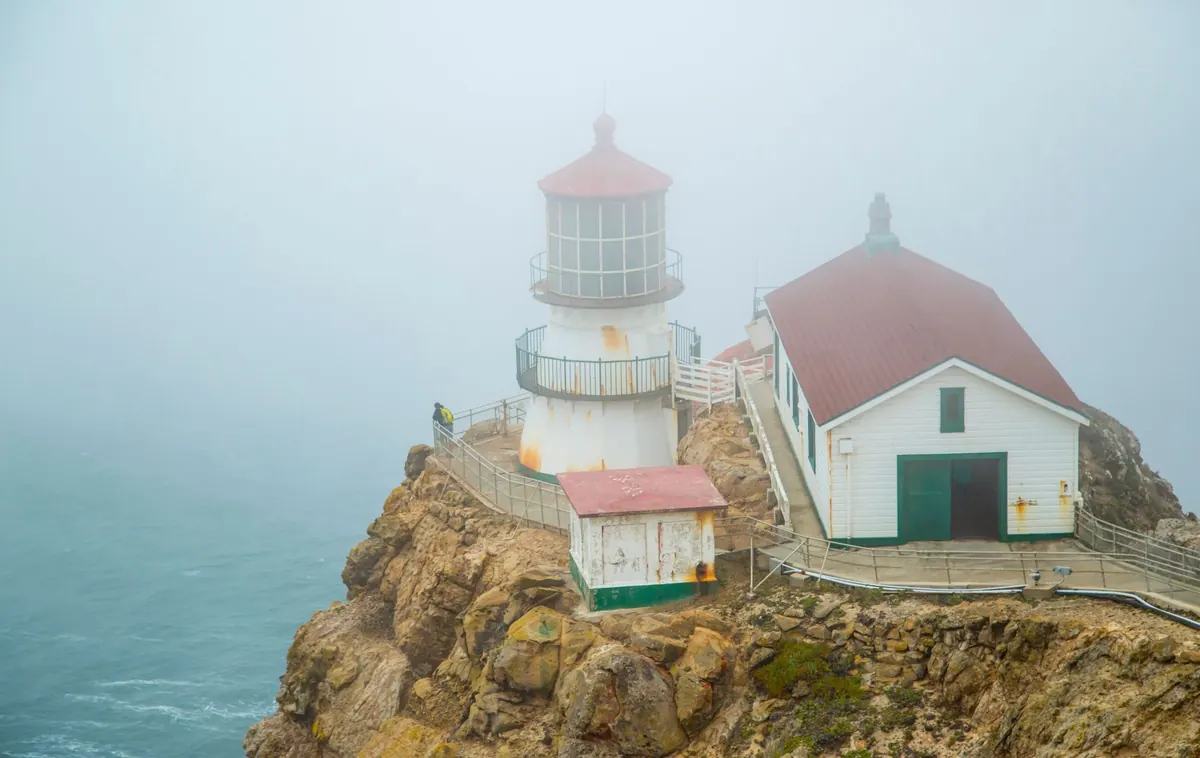
Fog turns a lighthouse into a silhouette. Rain adds texture to the beam. Wind pushes spray across the rocks and makes a familiar tower look like it is standing in the middle of the sea. These are the conditions many photographers hope for, and they are also the conditions that punish careless gear and rushed decisions. The good news is that moody lighthouse photography is less about exotic equipment than about a few reliable habits: reading the light, protecting the front glass, composing with patience, and knowing when to step back.
What follows is a field guide for the grey days — the ones that produce the most atmospheric frames, and the ones where a calm routine matters most.
Read the light before you expose
Fog and rain flatten contrast. Your camera’s meter sees a bright, even scene and often tries to expose it as if it were a normal landscape, which can leave the lighthouse too dark and the fog too bright. Start in manual mode or aperture priority, check the histogram after every few frames, and be willing to override the meter.
For a white lighthouse in fog, expose so the tower holds detail without clipping to pure white. The histogram should sit comfortably away from the right edge, but not so far left that the fog turns muddy. If your camera has highlight warnings, use them; blinking patches on the tower mean you have lost texture that will not come back easily. A stop of negative exposure compensation is a common starting point in bright fog, but the scene decides, not the rule.
A simple exposure workflow
- Set a moderate aperture — usually f/8 to f/11 — so the tower and nearby rocks stay sharp.
- Choose a low ISO, then raise it only when wind or rain makes a slow shutter impractical.
- Check the histogram and highlight warnings, then adjust exposure compensation or shutter speed.
- Refocus on the lighthouse itself, not the bright fog behind it, and take a test frame at 100 percent.
- Review the image on the back screen with the brightness turned down; a screen that is too bright will make fog look darker than it is.
Rain and spray also reduce contrast in a way that can fool autofocus. If the lens hunts, switch to manual focus and use live view magnification on the tower’s edge. In heavy fog, a distant lighthouse may be softer than you expect; that is the condition, not necessarily a focusing error. Aim for a sharp structural edge — a railing, a window, the lantern room — and let the atmosphere do the rest.
Protect the glass without fuss
Salt spray is the quiet enemy. It dries into a fine film that softens detail and creates flare around the beacon. Rain is easier to manage: a lens hood, a microfiber cloth, and a dry towel in a sealed bag will get you through most showers. Spray needs more attention. Wipe the front element gently and often, and avoid pressing grit into the glass.
A rain cover designed for your camera is useful, but a large plastic bag and a rubber band can work in a pinch. Keep the bag loose enough to operate the controls and tight enough around the hood to shed water. Silica packets in your camera bag help with condensation, especially when you move from cold, wet air into a warm car or café. Let the camera acclimatise inside its bag before opening it.
- Use a lens hood in rain and spray; it shields the front element and reduces flare.
- Carry two microfiber cloths: one for the lens, one for your hands and camera body.
- Keep a dry towel and a spare bag for the camera when you are not shooting.
- Avoid changing lenses outdoors in wind and rain; choose one zoom and stay with it.
- Check the front element before every sequence — a single smear can ruin a long exposure.
Filters are optional in rough weather. A polariser can help control reflections on wet rocks, but it also costs light and adds another surface to clean. If you use one, make sure it is seated properly and dry before you start.
Compose for mood, not just the tower
A lighthouse in fog can look small and isolated, which is often the point. Resist the urge to centre it every time. Look for foreground rocks, a wet path, a fence line, or the curve of a harbour wall to give the eye a route into the frame. In rain, dark wet stone against pale fog creates a natural tonal separation; use it.
Negative space is your friend. A large area of soft grey sky can make the tower feel more remote and more resilient. Try placing the lighthouse off-centre, with the beam pointing into the empty space. If the light is rotating, watch a few cycles before you shoot. You will learn how often the beam sweeps past your position and where it catches the mist.
Long exposures can smooth surf and make fog feel like a solid surface, but they also blur the beam into a soft wash. Short exposures freeze spray and keep the lamp crisp. Neither is better; decide what the scene needs. A tripod is almost always worth carrying, even in wind, because it slows you down and lets you fine-tune the composition without handheld compromises.
Make bad weather work with shutter and timing
Rain streaks show up best against dark backgrounds, so position yourself so the lighthouse or a dark headland sits behind the falling drops. A shutter speed around 1/60 to 1/125 second can render rain as visible streaks; faster speeds freeze individual drops, while slower speeds turn them into a haze. Experiment, then check the back screen at 100 percent.
Wind is a timing problem. Waves hit the rocks in sets, and the spray often peaks a second or two after the crash. Watch the pattern before you raise the camera. If you are making a long exposure, use a sturdy tripod, hang a bag from the centre column if your tripod has a hook, and shield the front of the lens from wind-driven rain. A remote release or a two-second timer reduces shake when your hands are cold and wet.
Don’t ignore the beacon itself. In fog, the lamp may be the only warm colour in the frame. Underexposing slightly can keep the glow from blowing out, while a shorter exposure preserves the shape of the lens. If the beam is rotating, a sequence of frames gives you choices later; blending is not always necessary, but having options is useful.
Stay safe and leave no trace
Rough weather makes familiar ground unfamiliar. Wet rock is slippery, cliffs are undercut, and waves can arrive higher than the last set. Stay behind barriers, keep away from wet edges, and never turn your back on the sea for long. Tell someone where you are going and when you expect to return, especially on remote coastal paths. If the wind is strong enough to push you off balance, it is strong enough to end the session.
Salt spray and rain can also affect your own footing and hands. Wear shoes with grip, keep your bag zipped, and avoid scrambling over rocks with a tripod in one hand. A headlamp is useful in grey light, and a dry layer in the car makes the walk back more comfortable. Take only photographs; leave the rocks, plants, and painted marks as you found them.
A field routine for wet, grey days
Before you leave the car, wipe the lens, fit the hood, and decide on one lens. At the location, watch the scene for a few minutes before setting up: where is the wind coming from, how often does the spray rise, which direction is the light moving? Set a safe exposure, take a test frame, and check the histogram. Then slow down. Compose with foreground and negative space, wait for the beam or the next wave, and clean the front element between sequences. When the weather turns from atmospheric to dangerous, pack up without apology. The best lighthouse photographs come from being prepared enough to stay calm — and sensible enough to know when to go home.
Photo: Stephen Leonardi / Pexels
Lighthouse Stays vs. Nearby Hotels: How to Choose Overnight Accommodation
A practical comparison of lighthouse keeper cottages and nearby hotels on access, amenities, noise,...
Seven Curious Lighthouse Superstitions and Coastal Legends
A tour through lighthouse ghosts, sailor taboos and wreckers' tales — and a practical guide to telling a...
About Us